A tile setter’s short list of must-have DIY tile tools, with practical tips on when and how to use each one for straighter lines, flatter surfaces, and few...
The Grout Nest
Updated October 17, 2026
How to Level a Plywood Subfloor Before Laying Tile or Hardwood
Learn how to flatten a plywood subfloor the right way using patching compound and self-leveling underlayment (SLU), plus the prep steps that prevent cracks, squeaks, and lippage.

Ben Mitchell
Ben Mitchell is a former professional tile setter and passionate home renovator with over 12 years of experience in the flooring industry. After stepping away from commercial contracting, he founded Grout Nest to empower everyday homeowners to tackle their own flooring, tile, and backsplash projects with confidence. He believes that with the right tools, proper prep work, and a little patience, anyone can achieve a professional-grade finish.
If you have ever set a tile and watched it rock like a tiny seesaw, you already understand the villain in most “my floor looks terrible” stories: the subfloor was not flat. Not “level like a pool table” flat. Just flat enough that tile does not teeter and hardwood does not telegraph dips and humps.
I grew up thinking you could brute-force a lot of flooring problems with more thinset, more nails, or more optimism. You can, briefly. Then grout cracks, tile edges catch your sock, and your beautiful hardwood develops a trampoline feel. Prep work is 90% of the job, and flattening a plywood subfloor is the part that feels boring until it saves you from a redo.
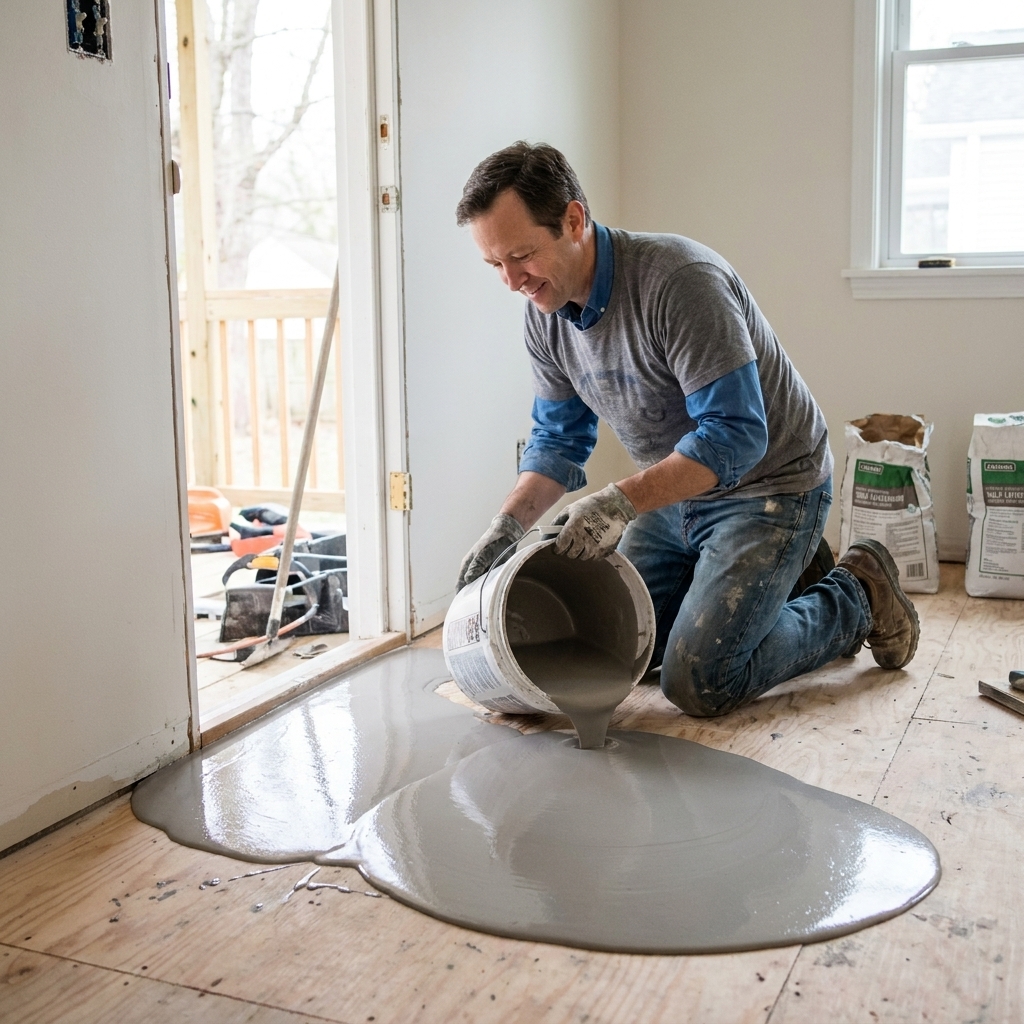
Flat vs. level
Let’s clear up the most common misunderstanding:
- Level means perfectly horizontal relative to gravity.
- Flat means no big dips or humps within a certain distance.
Most floors in real houses are not perfectly level, especially in older homes. Tile and hardwood do not demand “level.” They demand flat.
How flat is flat enough?
Different products have different requirements, so treat these as common targets, not eternal law. For tile, the numbers below mirror the common ANSI A108 and TCNA-style flatness language you will see referenced in guides and manufacturer instructions. Always check the specs for your specific tile, mortar, membrane, and flooring system.
- Tile (standard sizes): commonly no more than 1/4 inch variation in 10 feet, plus the short-span requirement of no more than 1/16 inch in 1 foot.
- Tile (large-format): commonly no more than 1/8 inch in 10 feet and no more than 1/16 inch in 2 feet.
- Hardwood or engineered wood: many brands call for something like 3/16 inch in 10 feet or 1/8 inch in 6 feet. The range is real, so read your box, not my mind.
If you have 12x24 tile planned, that is typically considered large-format under ANSI because one edge is 15 inches or longer. And if your floor has a 1/4 inch dip, that dip is not “character.” It is a cracked-grout subscription.
Tools and materials
You do not need a truck full of contractor gadgets, but you do need the right basics:
Tools
- 6 to 10 foot straightedge (a long level works, but a straightedge is the real hero)
- 2 foot level or straightedge for tighter spots
- Measuring tape and pencil
- Shop vac
- Drill with mixing paddle (for SLU)
- Gauge rake or smoothing tool (for SLU)
- Flat trowel and/or wide putty knife (for patch)
- Staple gun or hammer tacker (for lath, if required)
- Jigsaw or oscillating tool (for cutting door jamb underlayment transitions)
Materials
- Patching compound rated for plywood and floor use (for small dips and feathering)
- Self-leveling underlayment (SLU) rated for wood substrates (for broader low areas)
- Primer required by the SLU manufacturer
- Galvanized diamond metal lath (only if your SLU requires it over plywood)
- Deck screws (for re-fastening plywood)
- Construction adhesive (optional, only for re-securing loose areas from below where possible)
- Caulk or spray foam (for sealing gaps to prevent SLU leaks)
- Foam sill seal or weatherstrip (for temporary dams)
Important: Not every self-leveler is approved for plywood. Buy one that explicitly says it can be used over wood, then follow that product’s system: primer, lath if required, minimum thickness, cure time, and any limitations about adhesives or finishes installed on top.
Step 1: Confirm the subfloor
Before we talk about leveling compounds, make sure the plywood itself is appropriate. Flattening a floor that is too bouncy is like frosting a cake made of Jell-O.
Tile needs stiffness
- Joist structure should meet tile deflection requirements (commonly L/360 for ceramic, L/720 for natural stone).
- Plywood thickness depends on joist spacing, span, and the underlayment system. In some tested assemblies, 5/8 inch can be acceptable under specific conditions and joist spacing, but many manufacturers and tile assemblies call for 3/4 inch or two layers, especially as joist spacing increases. Verify against your chosen backer or membrane system and your actual framing, not vibes.
- Plan for a tile underlayment system: cement board, a decoupling membrane, or a mortar bed. Those products still want a flat floor.
Hardwood needs fastening
- Loose sheets or squeaks will only get louder after the new floor goes in.
- Make sure you can meet fastening requirements if you are nailing down hardwood.
If the subfloor has water damage, delamination, or major rot, leveling compound is not the fix. Replace the bad sections first.
Step 2: Map highs and lows
This is where most DIY projects go off the rails. People see a dip and start filling. What they miss is the high spot that actually controls everything.
How to check quickly
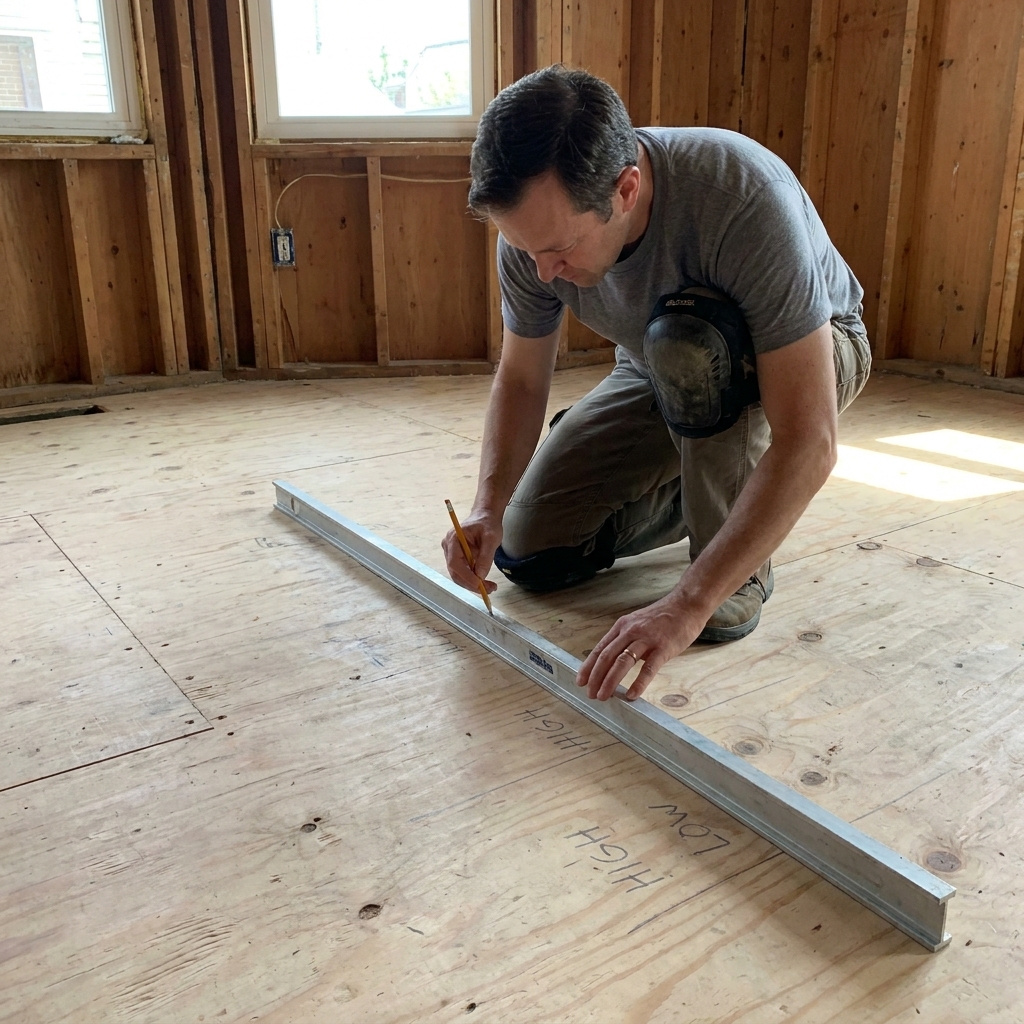
- Lay a 6 to 10 foot straightedge on the floor in multiple directions.
- Rock it gently. If it rocks, there is a high spot somewhere under the straightedge acting like a pivot.
- Where you can slide a shim under the straightedge, you found a low spot.
- Circle highs with an “H” and lows with an “L” using pencil.
- Measure the worst gaps with feeler gauges, stacked shims, or a tape measure.
If you want to be extra accurate (and I usually do), snap a few chalk lines and check along them. You will start seeing patterns like sagging between joists or a crowned seam where two plywood edges meet.
Step 3: Fix movement first
Leveling products are not structural. If your plywood moves, the fancy cement topping you pour on top will crack or debond.
What to do
- Re-screw the plywood to eliminate squeaks and panel movement. For an existing subfloor layer, a common approach is every 6 to 8 inches along edges and 8 to 10 inches in the field, using deck screws, not drywall screws.
- Two-layer tile floors note: In many tile industry two-layer plywood methods, the second layer is intentionally fastened only to the first layer, not into the joists, to reduce movement transfer. Follow the method you are building, not a generic schedule.
- Address seam lippage (one panel edge higher than the other). This is a major cause of tile lippage and wood telegraphing.
- Remove protruding fasteners or drive them flush.
If you can access from below, you can sometimes eliminate stubborn squeaks by adding blocking or applying adhesive at the joist interface. From above, screws are your best friend.
Step 4: Knock down highs
You will always have an easier time flattening a floor by knocking down highs than by trying to fill the entire planet up to the highest mountain.
Common highs and fixes
- Crowned joist line or seam ridge: sand it down with a floor sander or belt sander, or plane carefully. Vacuum thoroughly afterward.
- Plywood edge swell from moisture: sanding works if the damage is minor. If it is swollen and soft, replace that section.
- Subfloor patch proud of surrounding area: sand or plane flush.
Safety note: Sanding plywood and cement-based compounds creates nasty dust. Wear a properly fitted respirator (an N95 at minimum, P100 is better), and follow the product SDS if you are grinding anything cement-based.
Dust control matters because primers and mortars hate dirty surfaces. Also because lungs hate dust. Everybody loses.
Step 5: Pick your method
There are two main approaches on plywood, and you can combine them:
Option A: Patching compound
Use patch when:
- The low spots are localized.
- You need to feather a depression to nothing over a short distance.
- You are correcting around seams, repairs, or small valleys.
Most patch compounds can be applied from feather edge up to a limited thickness (check the bag). They do not magically level themselves, but they are easy to control.
Option B: Self-leveling underlayment
Use SLU when:
- The room has widespread dips.
- You need to correct a larger area uniformly.
- You want the surface to seek a flatter plane with less hand-finishing.
SLU is fantastic, but it is unforgiving if you skip primer, ignore minimum thickness, or let it leak into every crack like it is trying to escape the house.
Step 6: Prep for SLU
If you remember nothing else, remember this: self-leveler is a system. The primer and the prep are not optional add-ons.
1) Clean hard
- Vacuum thoroughly, then vacuum again.
- Scrape off paint drips, drywall mud, adhesive residue, and anything glossy.
- Remove all loose debris around seams.
2) Seal gaps
- Seal cracks, seams, and holes with caulk (or minimally expanding foam sparingly).
- Install temporary dams at doorways and around floor vents.
- Wrap toilet flanges or plumbing penetrations if you are working in a bath.
I have watched SLU vanish through a 1/8 inch gap at the baseboard and reappear in the room below like a very expensive ceiling stain. Do not be me in 2014.
3) Prime the plywood
- Use the primer specified by the SLU manufacturer.
- Apply it evenly and let it dry the full recommended time.
- Do not puddle primer in low spots unless the instructions tell you to.
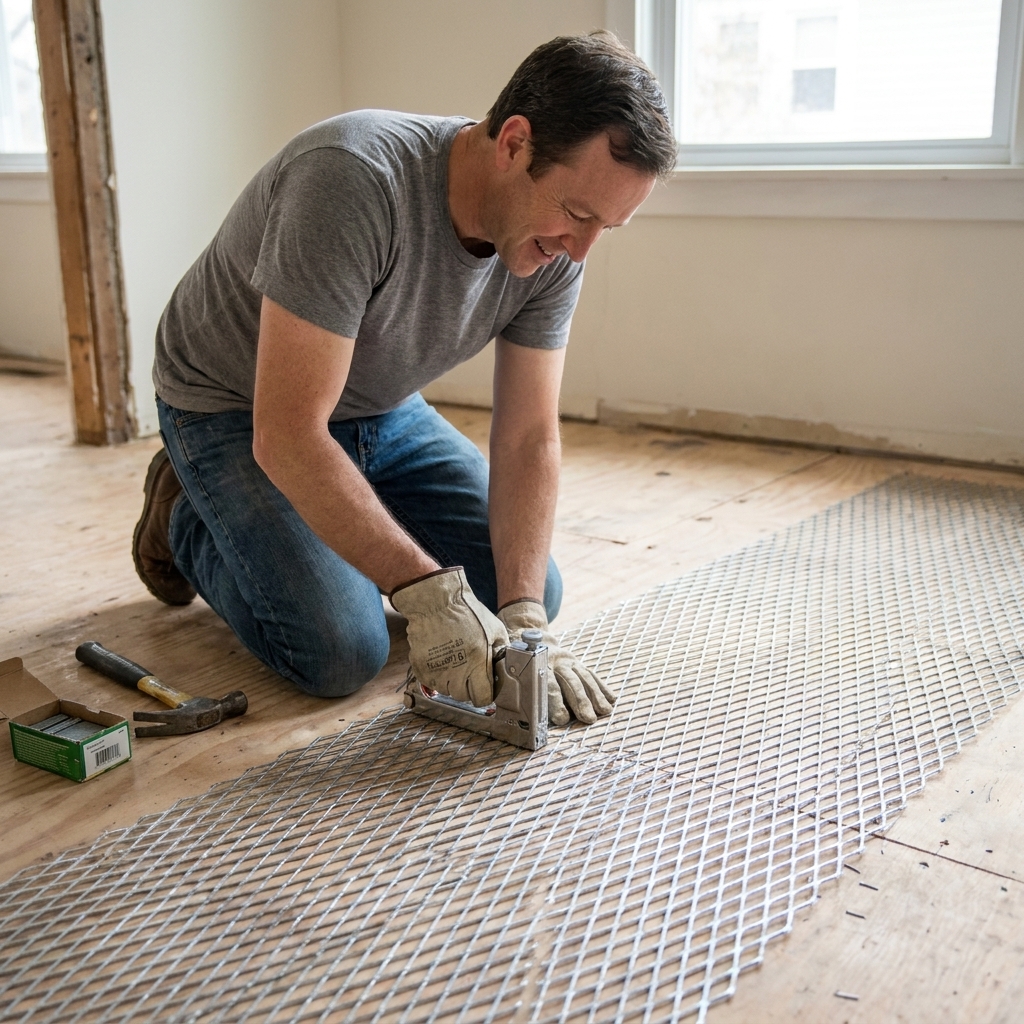
4) Add lath if required
Many wood-rated SLUs require diamond metal lath over plywood to reinforce the pour and help it grip. Some newer systems do not. If your product calls for it, do it:
- Staple lath tight to the plywood.
- Overlap seams as directed (commonly a couple inches).
- Keep it flat with no tenting or sharp edges sticking up.
Thickness reminder: Over plywood, many SLU systems require a thicker pour (often 3/8 inch or more) and do not allow true feather edges. The bag will tell you what is allowed for that product. Believe it.
Step 7: Mix and pour SLU
SLU moves fast. Your success is mostly determined before you ever open the bag: staging, measuring water, the room temperature, and having enough help.
Before you start
- Read the bag for water ratio, working time, minimum thickness, and acceptable temperature range.
- Have all bags in the room and staged.
- Use cool, clean water and measure it. Do not eyeball it.
- Have a second bucket so you can keep mixing without stopping.
- Plan an exit path so you do not paint yourself into a corner.
Mixing tips
- Put water in the bucket first, then powder.
- Mix with a drill and paddle until smooth and lump-free, for the time listed on the bag.
- Do not add extra water to “make it flow more.” That weakens the pour and can cause cracking or dusting.
- Do not “retemper” a batch that is starting to set by remixing it with water. Make a fresh batch.
Pouring and spreading
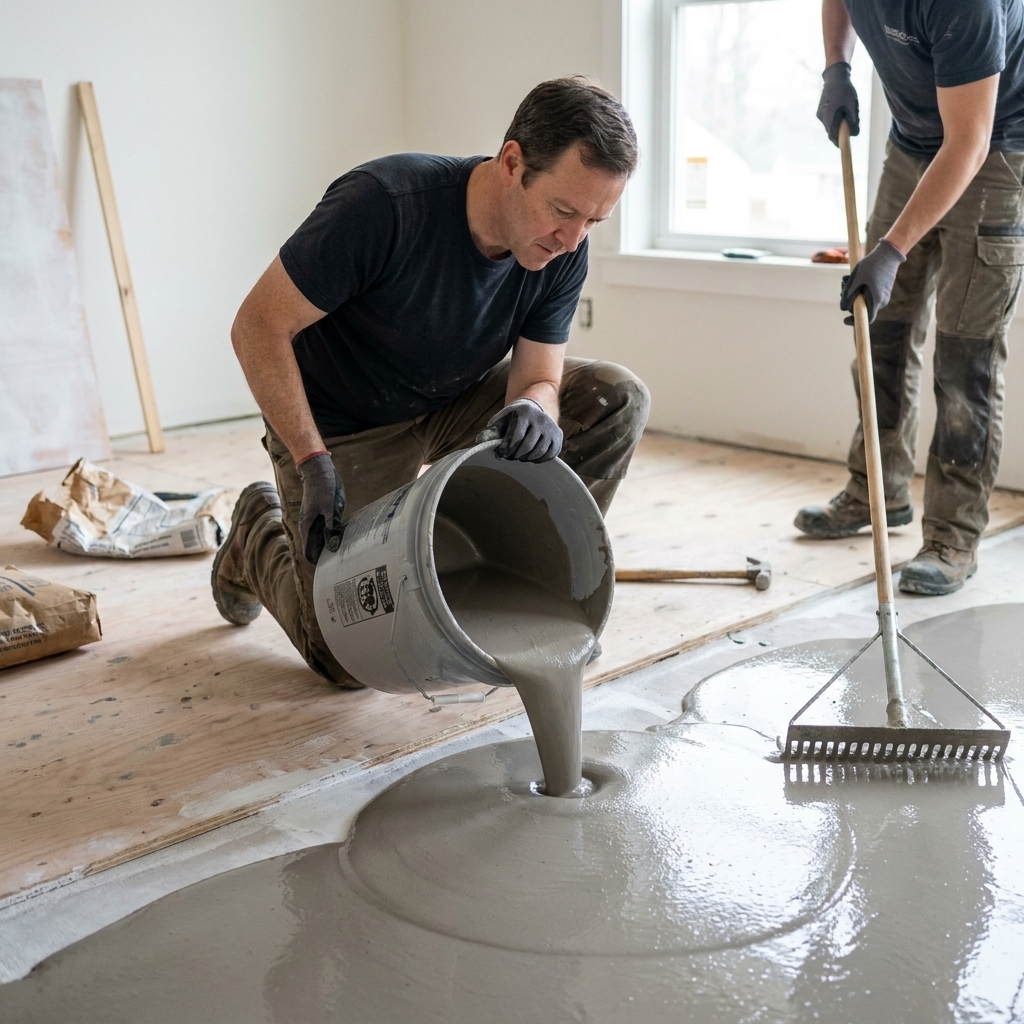
- Start at the far end and pour in ribbons.
- Use a gauge rake or a flat trowel to guide it, especially around edges.
- Help it find low spots by pulling material into valleys and maintaining a consistent depth. If your manufacturer allows it, a spike roller can help release bubbles and blend passes, but it is not required for every product and it is not allowed for every product.
- Keep a wet edge between batches to avoid cold joints.
Once it is down, stop fussing. Overworking SLU as it starts to set creates ridges that you will later sand while questioning your life choices.
Step 8: Patch to finish
Even a good SLU pour often needs small touch-ups, especially at perimeters and transitions. Patch compound is perfect for:
- Feathering the SLU edge into an adjacent area.
- Filling small divots, trowel marks, or pinholes.
- Fixing minor low spots you missed in mapping.
How to patch cleanly
- Vacuum first. Patch hates dust.
- Mix to a peanut-butter consistency (or per the product instructions).
- Apply with a flat trowel, pressing firmly to avoid air pockets.
- Feather edges wide so you do not create a speed bump.
If you can feel the edge with your shoe, you will definitely see it under hardwood and you will definitely fight it when setting tile.
Step 9: Re-check
After the SLU or patch cures fully:
- Run the straightedge again in multiple directions.
- Circle any remaining highs and lows.
- Sand minor ridges or high spots (respirator on, vacuum well).
- Spot patch any shallow lows.
This re-check step is the difference between “good enough” and “it lays like butter.” It is also the moment you catch mistakes while they are still easy to fix.
Moisture and wet areas
One quick reality check for bathrooms, laundry rooms, and kitchens: SLU is not waterproof. It can be part of a floor build-up in a wet area, but waterproofing (if required) is a separate layer with its own rules.
- If you need waterproofing, follow the membrane manufacturer instructions for where that layer goes in the stack.
- Do not assume a cement-based pour equals a waterproof floor. Water will laugh and keep moving.
Common layer stacks
If sequencing makes your brain itch, here are common, real-world orders. These vary by product, so use them as a map, then confirm with the manufacturer instructions for your specific system.
Tile (common)
Plywood subfloor → flatten (patch or SLU if used) → thinset → cement board or uncoupling membrane → thinset → tile
Hardwood (common)
Plywood subfloor → flatten (patch or SLU if compatible with your adhesive or underlayment) → underlayment or adhesive per flooring spec → hardwood
The big takeaway: cement board and membranes do not flatten floors. They follow whatever you give them.
Special situations
Dips between joists
This often indicates subfloor flex or inadequate thickness. SLU can make it flatter, but it will not make it stiffer. For tile, consider adding plywood, improving framing, or using a tile underlayment system appropriate for your structure.
Big transitions
If flattening raises the floor, plan your transitions now:
- Hardwood can use reducers or thresholds.
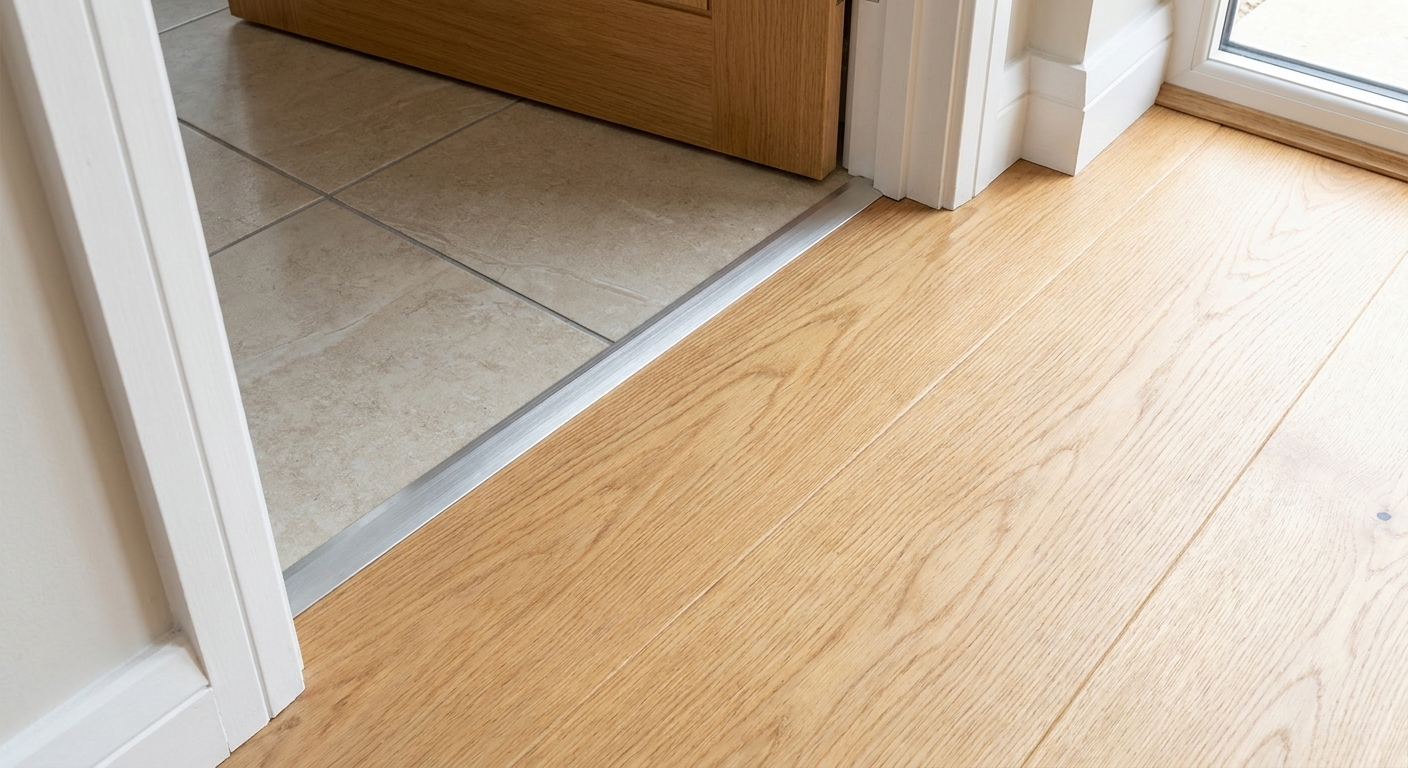
- Tile transitions often look best with a matching stone or metal profile.
Radiant heat
Follow the heating system’s instructions. Some systems require encapsulating with SLU, some want thinset, and most require a primer compatible with both products. Compatibility is everything here.
Common mistakes
- Skipping primer: leads to debonding, pinholes, and weak spots. Prime per the product system.
- Not sealing gaps: SLU finds holes you did not know existed.
- Adding extra water: makes it flow, then makes it fail.
- Trying to level a moving floor: fix squeaks and loose panels first.
- Ignoring minimum thickness: too thin can crack, especially on wood.
- Pouring too slowly: SLU has a working time. Stage materials and get help for big rooms.
- Ignoring compatibility: some SLUs and patches require specific primers and are not approved under certain hardwood adhesives or finishes. Read the system, not just the bag.
FAQ
Can I use self-leveling compound directly on plywood?
Only if the specific SLU you buy is rated for wood substrates and you follow that manufacturer’s prep requirements. That typically includes primer and may include metal lath and a minimum thickness.
Do I need to flatten before cement board or a membrane?
You still need the floor to be flat. Cement board does not flatten a floor, it follows it. Uncoupling membranes also follow the plane beneath them. Flatten first, then install your underlayment.
Do I flatten the whole room or just the low spot?
If it is a localized dip, patching just that area is often fine. If the floor is generally wavy, SLU across the room is usually faster and gives a more consistent result. The straightedge test tells you which camp you are in.
How long do I wait before tile or hardwood?
Follow the SLU product instructions. Some are ready for foot traffic in a few hours but need longer before thinset, adhesive, or wood installation. Temperature and humidity change cure times.
My final take
If you are staring at a plywood subfloor and wondering whether flattening is worth the hassle, here is my honest answer: the floor you install can only look as good as what it is sitting on. Spend the extra day mapping, fixing highs, sealing, priming, and pouring correctly. Your grout lines, your hardwood joints, and your future self will thank you.
And yes, Barnaby will absolutely try to walk across it before it cures. Plan accordingly.