A step-by-step homeowner guide to checking flatness, fixing low and high spots, and using patch or self-leveling underlayment on plywood so your tile or hard...
The Grout Nest
Updated October 17, 2026
Silence Squeaky Floors Under Hardwood or Laminate
Track down floor squeaks and fix them from above with breakaway screws, powder, and subfloor reinforcement tricks. Step-by-step guidance for hardwood or laminate.

Ben Mitchell
Ben Mitchell is a former professional tile setter and passionate home renovator with over 12 years of experience in the flooring industry. After stepping away from commercial contracting, he founded Grout Nest to empower everyday homeowners to tackle their own flooring, tile, and backsplash projects with confidence. He believes that with the right tools, proper prep work, and a little patience, anyone can achieve a professional-grade finish.
Squeaky floors are basically your house doing a bad impression of a haunted ship. The good news is most squeaks under hardwood or laminate come from one simple problem: movement. The subfloor flexes, a fastener rubs, or the flooring shifts, and you get that chirp every time you step on the “wrong” board.
This guide focuses on fixes you can do from above, meaning no crawling in the basement and no opening up a ceiling. We will locate the squeak, figure out what is actually moving, then lock the right layers together so the floor sits tight to the joist with no vertical play.

What causes squeaks under hardwood or laminate
I know it is tempting to blame the top flooring, but the noise usually comes from friction lower in the stack.
- Subfloor to joist movement: The subfloor was nailed, the nails loosen over time, and the panel lifts and drops slightly as you walk.
- Subfloor panel edges rubbing: Two sheets meet, there is no blocking, and the edges flex and squeak.
- Fastener rub: A nail shank or staple is moving in wood like a tiny violin bow.
- Laminate floating floor noise: Laminate is supposed to float. If it is pinched at the perimeter, has the wrong or insufficient underlayment, has a damaged or compressed pad (including attached pad), or has a low spot, it can creak, click, or pop.
- Hardwood board movement: Less common, but seasonal expansion or a loose board can squeak on its neighbor or on the underlayment.
Rule of thumb: If you can stop the movement, you stop the noise. That is why prep work matters. If you skip the detective part and start driving screws everywhere, you will make a mess and still have a squeak.
Before you start: know your floor
Hardwood (solid or engineered)
Hardwood is usually fastened down (nails or staples) or glued. You can often screw through it if you plan your holes carefully and patch them afterward.
One big caveat: engineered hardwood varies wildly. If the wear layer is thin, it can chip and show every repair. If you are not sure what you have, test your process in a closet first.
Laminate (floating)
Laminate typically floats over underlayment. You can use breakaway screw kits on laminate in very limited cases, but you must be careful. Fastening a floating floor can be against manufacturer specs, can void warranties, and can cause peaking or buckling if expansion space is tight.
If your laminate squeak is more of a clicking sound at seams, start with underlayment and perimeter clearance checks before you commit to fastening anything down.
Tools and materials (what I actually use)
- Breakaway screw kit (example: Squeeeeek No More or similar), with depth-setting guide
- Stud finder (with deep scan) or a strong magnet for finding joist nails
- Painter’s tape and a pencil
- Drill/driver with clutch control
- 1/8 in. drill bit (optional, for predrilling hardwood)
- Countersink bit (helpful for hardwood patching)
- Wood filler matched to your floor color (hardwood only)
- Putty knife and a rag
- Talcum powder or graphite (for minor board-to-board squeaks)
- Construction adhesive (only for targeted reinforcement, explained later)
If you are the type of person who buys tools for “just this one job,” welcome to the club. I own three different stud finders because apparently I enjoy suffering.
Step 1: Find the squeak
You need the exact spot that triggers the noise, not the general neighborhood. Also, if there is an area rug, move it. Rugs can hide the real source and make you chase ghosts.
Mark the noisy spot
- Have a helper walk slowly while you listen close to the floor.
- Mark the loudest spot with painter’s tape.
- Repeat from different angles. Squeaks can travel along a board or joist.
Find the joist line
Most successful “from above” squeak fixes anchor the subfloor to a joist. So we need to know where the joists are.
- Use multiple clues: floor registers, typical joist direction (often consistent across a room), and nail patterns in older hardwood.
- Use a magnet: A strong magnet sliding on the floor can “catch” on fasteners, which often line up over joists.
- Use a stud finder carefully: Deep scan mode is the setting meant to read deeper than drywall thickness. On floors, stud finders can be unreliable because wood density and fasteners confuse them, so treat it as one clue, not the final answer.
Quick check: If the squeak happens when you step between joists, it can still be subfloor flex, but fastening into the joist is usually the long-term fix.
Step 2: Pick the right fix
Best case: loose subfloor on a joist
This is where breakaway screws shine. You drive a special screw down through the flooring and subfloor into the joist, then snap the head off below the surface. The movement stops, the squeak dies.
Subfloor seam squeak
If the squeak sits along a line and feels “hingey,” you may be on a subfloor seam that lacks support. We can still use breakaway screws, but you may need multiple screws and, in stubborn cases, reinforcement tricks described below.
Minor hardwood board rub
If it is a light chirp right at a board edge and the floor is otherwise solid, lubricant powder can help. This is not my favorite fix, but it is low-risk and sometimes it works.
Laminate click or creak
Laminate noise is often an underlayment issue, a low spot, or the floor being pinched at baseboards. Screwing it down can trade one noise for another. Start with the laminate checks section below.
Fix squeaks with breakaway screws
This is the method I recommend most often for squeaks over joists. Done carefully, it is clean, strong, and repeatable.
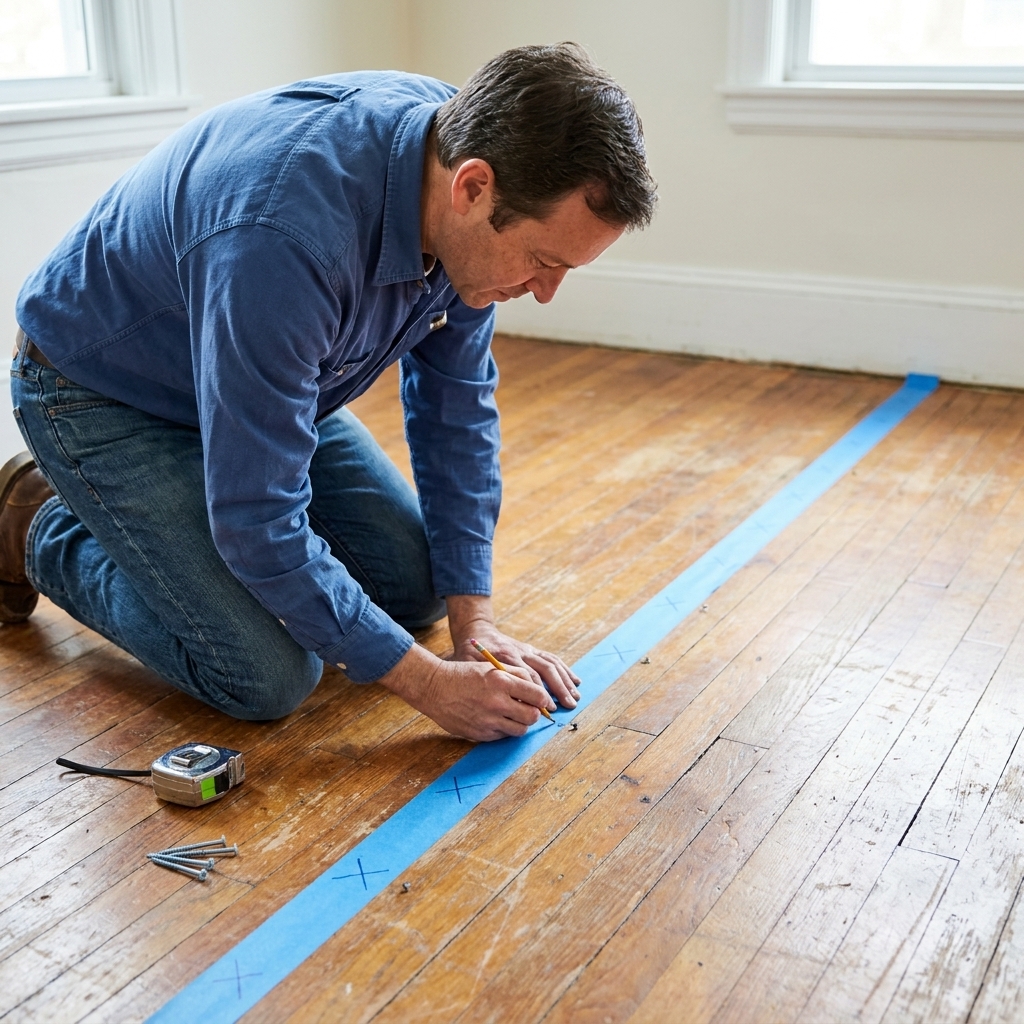
1) Mark your joist line
Once you locate the joist, extend the line across the squeak area using tape markers. You want screws to land in the joist, not miss it by 3/4 in. and accomplish nothing.
2) Set the depth guide
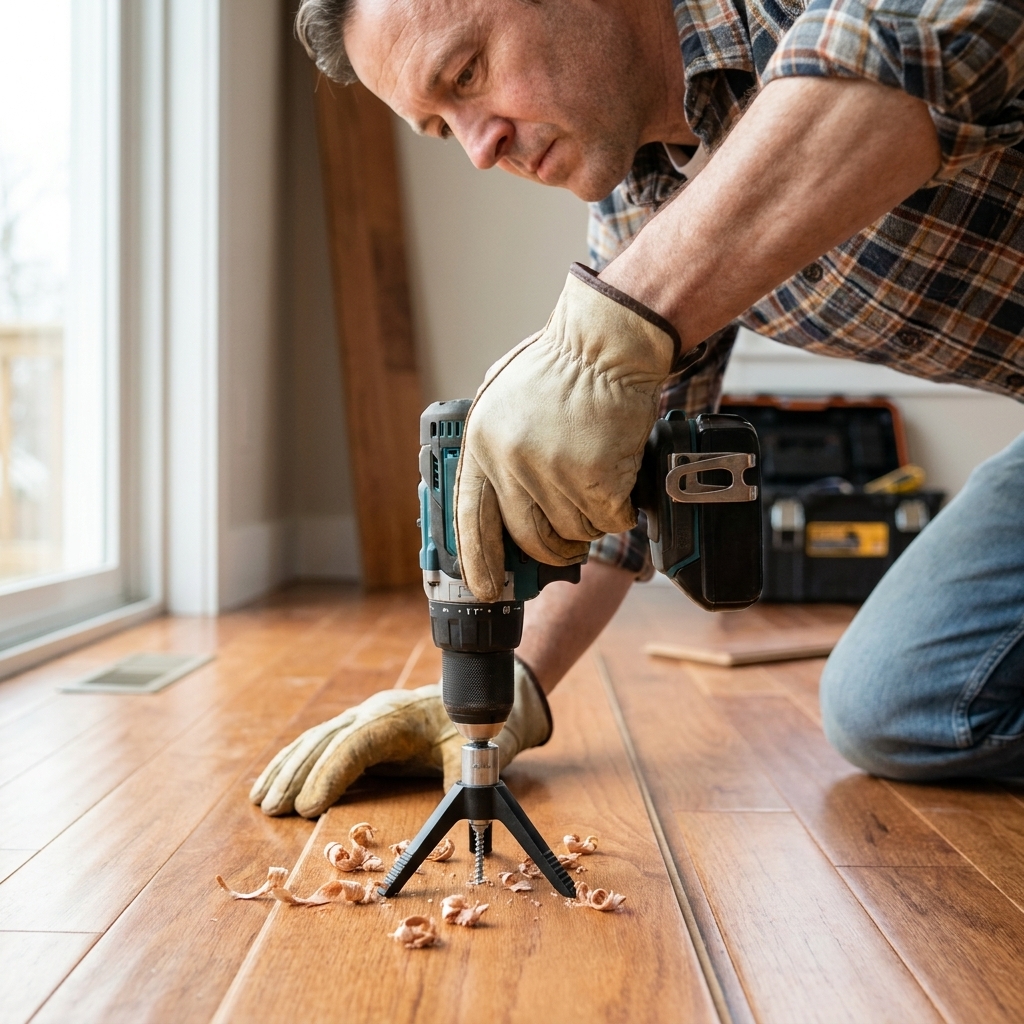
Breakaway kits come with a tripod-like depth guide. It controls how deep the screw head sits before it snaps. Follow the kit instructions for your flooring thickness. Too shallow and you risk a visible divot. Too deep and you might not snap cleanly.
3) Predrill if you are on hardwood
For solid hardwood, especially older and drier boards, I like a small pilot hole to reduce the chance of splitting. Use a bit slightly smaller than the screw’s core.
For laminate, predrilling is usually not required, but go slow and keep the driver straight to avoid chipping.
4) Drive the screw straight
Put steady pressure on the guide, keep the drill vertical, and drive until the kit tells you to stop. Do not muscle it like you are sinking deck screws. Overdriving can strip the joist or crater the surface.
What “biting a joist” feels like: the drill tone drops and the resistance increases as the threads pull into solid framing. If it spins “too easy” the whole way, you may have missed.
5) Snap the head off
Most kits are designed so the head snaps with a sideways motion after driving. The break should happen below the surface line so your patch is small.
6) Test before patching
Walk the area. If it still squeaks, do not patch yet. Add a second screw about 1 to 2 in. away on the same joist line and test again.
How many screws? For a single squeak, 2 screws is common. For seam squeaks, you might use 3 to 6 spaced a few inches apart.
Patch holes on hardwood
Breakaway screws leave small holes. On hardwood, you can make those nearly invisible.
- Vacuum dust from the hole.
- Press in color-matched filler with a putty knife.
- Wipe the surface lightly with a rag. Do not pull filler back out of the hole.
- Let it cure per the product, then buff lightly if needed.
Pro tip: If you cannot find a perfect color match, buy two close colors and blend them. I have done some surprisingly convincing “floor makeup” over the years.
Laminate checks first
Laminate gets noisy when it cannot float the way it was designed to. Before you fasten anything down, try to solve the “why.”
Check perimeter clearance
Remove a baseboard section or shoe molding and confirm there is a small gap between laminate and drywall. If the laminate is tight to the wall, it can creak and click. The fix is trimming the edge back slightly and reinstalling trim to cover the gap.
Check for soft spots and low spots
If the subfloor dips, laminate can flex and make noise. Since we are working from above, the realistic fix is correcting the subfloor flatness, which can mean pulling and re-laying that section. Not fun, but neither is living with it.
Try a seam powder fix
If the click is at a seam and feels like friction, you can sprinkle a tiny amount of talc or graphite at the joint and work it in by stepping and gently tapping along the seam with a soft block. Vacuum the excess.
Important: This is a band-aid. If the subfloor is moving, powder will not save you for long.
When screws are not enough
Sometimes the squeak is stubborn because the subfloor is flexing in a way a couple of fasteners will not fully control. Here are the “been-there” options that still avoid tearing up the whole floor.
Widen the screw pattern
Instead of two screws right at the squeak, place additional breakaway screws along the same joist line, 6 to 8 in. apart, spanning the noisy zone. You are distributing load so the panel cannot seesaw.
Catch both sides of a seam
If the noise is near a seam, add screws on both sides of the seam. Put each screw into framing where possible. Panel edges love to flex.
Targeted adhesive injection (last resort)
If you are dealing with a localized void where the subfloor is not well-bonded or has a tiny gap, a small amount of adhesive can help. It can also go sideways quickly, especially from above, because you are drilling a visible hole and you cannot see where the glue is going.
- Drill a very small hole at the squeak point.
- Use an adhesive that stays put and does not foam or expand.
- Inject a small amount.
- Weight the area flat until cured.
Warning: Adhesive can telegraph through seams, stick floating layers, or leave a hard bump if overused. This is a last resort, not a first move.
When not to use breakaway screws
- Radiant heat: If there is any chance of in-floor heating tubes or wires, do not blindly drive screws. Confirm the system layout first.
- Hidden plumbing or wiring: Be extra cautious in kitchens, baths, and laundry areas where supply lines and electrical runs are more likely. If you cannot confirm what is below, do not take long shots with fasteners.
- Very thin engineered veneer: Some products chip easily. Test in a closet first.
- Floating floors tight at the walls: Fix the perimeter pinch first.
- Squeak is actually trim: Sometimes it is a baseboard rubbing the floor. A little shim behind the trim or a finish nail can fix it without touching the floor.
Troubleshooting
You missed the joist
Most common issue. If the screw did not bite solid wood, it will not pull the subfloor down. Re-locate the joist line and try again. Confirm with more than one clue (magnet hits, fastener lines, register alignment) before you commit to more holes.
The squeak moved
That usually means you reduced movement at one point and revealed a second loose spot nearby. Keep testing outward in small steps and fasten as needed.
The noise is crackle, not squeak
Crackling under laminate often points to debris under the underlayment, a damaged pad, or a compromised locking joint. That is typically a pull-and-repair situation.
The floor feels bouncy
If the whole area flexes, the issue might be joist span or subfloor thickness, not just a loose fastener. Above-floor fixes have limits. Some situations need blocking, sistering, or other support from below.
FAQ
Will breakaway screws ruin my hardwood?
If you place them on a joist line, drive them straight, and patch the small holes, they are usually very discreet. On rustic floors, they practically disappear. On ultra-smooth, high-gloss floors, you will see the patches if you look for them.
Can I fix squeaks without drilling holes?
Sometimes. If the squeak is board-to-board friction, powder can help. If the squeak is subfloor movement, a real fix generally means fastening or reinforcement, which usually involves a hole somewhere.
Do I need to find the joists?
For long-term results, yes. Fastening subfloor to joist is the most reliable way to stop squeaks. Screws that only bite subfloor layers do not usually hold up.
Is it safe to screw through laminate?
It can be, but it is not always the best first move. Verify the laminate has proper expansion gaps and is not being pinched. Also check your warranty and installation requirements. If you do screw it, keep it targeted and understand you are partially defeating the “floating” design.
My final checklist
- Confirm floor type and whether it is floating or fastened.
- Move rugs, then locate the squeak precisely and mark it.
- Find the joist direction and centerline using multiple clues.
- Use breakaway screws with a controlled, straight drive.
- Test before patching, then patch carefully.
- If needed, widen the screw pattern to stiffen the area.
- If the floor is bouncy, set expectations and consider support from below.
If you take nothing else from me, take this: prep work is 90% of the job. The actual screw-driving part is easy. The win is locating the movement and locking the right layers together.