A step-by-step hexagon tile floor guide for small bathrooms: layout planning, subfloor prep, thinset tips, hard cuts, safety, and even grout lines.
The Grout Nest
Updated October 17, 2026
Square a Room and Snap Chalk Lines for Tile
Learn how to square a room and snap dead-straight chalk lines before tiling. Step-by-step 3-4-5 method, dry layout tips, and how to use a laser for a centered, professional finish.

Ben Mitchell
Ben Mitchell is a former professional tile setter and passionate home renovator with over 12 years of experience in the flooring industry. After stepping away from commercial contracting, he founded Grout Nest to empower everyday homeowners to tackle their own flooring, tile, and backsplash projects with confidence. He believes that with the right tools, proper prep work, and a little patience, anyone can achieve a professional-grade finish.
If your tile job ever “mysteriously” starts straight and ends with wedge-shaped cuts and grout lines that look like they had a rough night, the culprit is usually layout. Not thinset. Not the tile. Layout.
I set tile for years, and I still treat layout like it is the job. Because it kind of is. Once you snap your lines, you are committing. The good news is you do not need contractor superpowers to get a pro-grade layout. You need a tape measure, a pencil, a chalk line, and the patience to double-check yourself.

In this guide, I will walk you through squaring the room with the 3-4-5 rule, dry-fitting a layout so you avoid ugly sliver cuts, and using a laser level plus chalk lines to keep everything straight from the first tile to the last.
Tools that make layout painless
You can square and layout a room with basic hand tools, but a couple upgrades make it faster and more accurate.
- Tape measure (25 ft is usually plenty)
- Pencil and notepad for quick math and marks
- Chalk line (quality matters, cheap lines clog and snap weakly)
- Chalk (blue is easier to clean, red is hard to remove and can stain porous or light surfaces)
- Laser level (a cross-line laser is perfect for tile)
- Speed square (handy for quick checks at thresholds and small spaces)
- Straightedge or a long level (to connect marks or verify)
- Painter’s tape (for layout marks on surfaces you do not want to stain)
Pro tip: If you are working on concrete or dusty underlayment, vacuum first. Chalk lines on dust are like writing your name on a frosted donut. It looks fine until you touch it.
Step 1: Pick your control area
Before you square anything, decide what you want to look straight.
- Most floors: prioritize the longest, most visible run, usually the main hallway sightline or the longest wall in an open area.
- Bathrooms: prioritize what you see from the doorway and the vanity face. The back wall behind the toilet is rarely the star of the show.
- Kitchens: prioritize cabinet toe-kick lines and the main walkway. Do not assume walls are straight, because they often are not.
This matters because you can be perfectly square to a crooked wall and still look crooked to the eye. Layout is partly math and partly optics.
Step 2: Square your layout lines
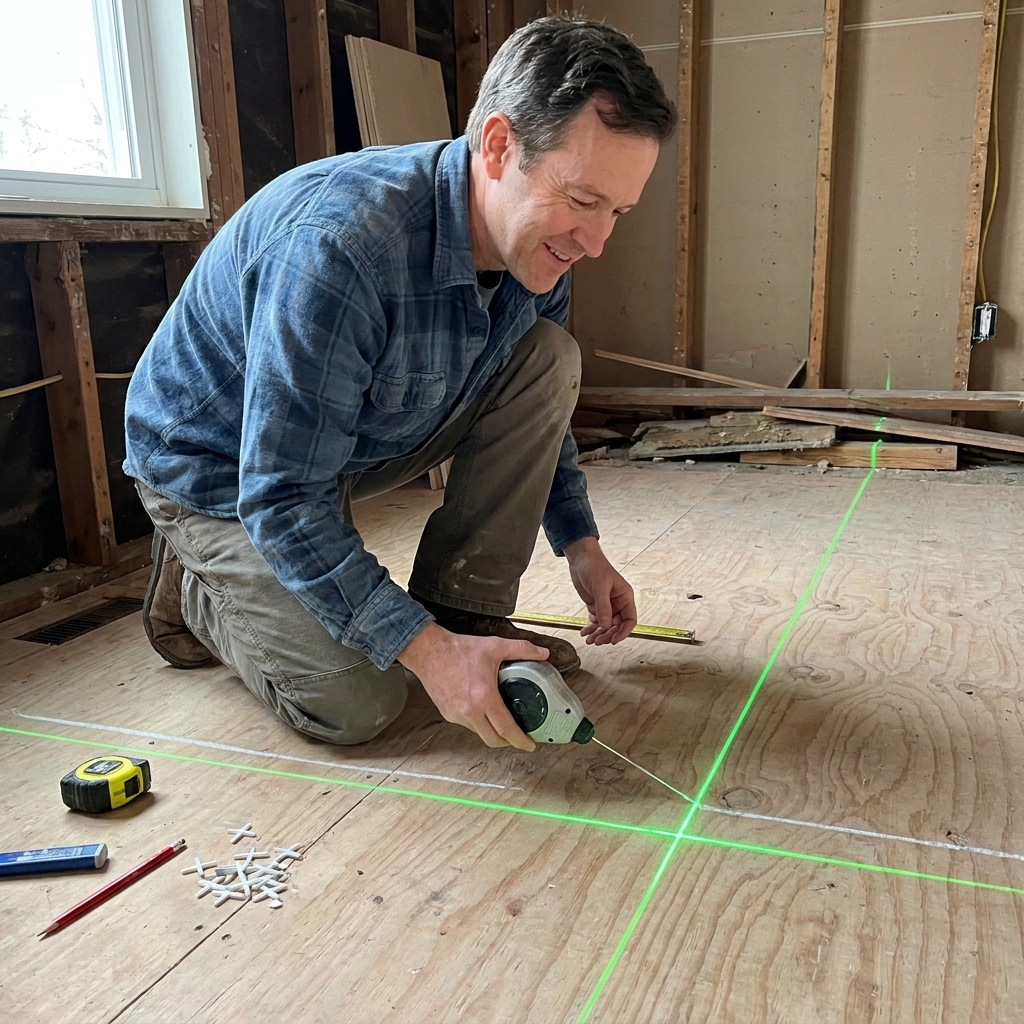
The 3-4-5 rule is a simple way to create a true 90 degree angle using a right triangle. If one leg is 3 units and the other is 4 units, the diagonal between them should be 5 units when the angle is exactly 90 degrees.
You can scale it up for better accuracy:
- 3-4-5 feet (small spaces)
- 6-8-10 feet (better)
- 9-12-15 feet (even better if you have room)
How to do it (worked example)
To keep it simple, here is the 6-8-10 version, which is accurate and manageable on most floors.
- Pick your baseline. Snap a line parallel to the feature you care about (often the longest wall or a doorway sightline). Call it Line A.
- Choose a corner point. Mark a point on Line A where you want your perpendicular line to cross.
- Mark 8 ft on Line A. From your corner point, measure 8 ft along Line A and make a mark.
- Create a rough perpendicular and mark 6 ft. From the corner point, measure about 6 ft out in the general direction of your perpendicular line and make a temporary mark.
- Set the diagonal to 10 ft. Measure from the 8 ft mark on Line A to the temporary mark on the perpendicular. Shift the temporary mark until that diagonal measurement is exactly 10 ft.
- Snap Line B. Snap a chalk line from the corner point through your adjusted mark. That line is square to Line A.
Reality check: If your room is out of square (many are), your lines can still be square. That is the whole point. You are building a square grid that looks right, even if the walls do not.
Step 3: Find center, then adjust
Homeowners often hear “start in the center of the room.” That is a solid default, but it is not a law of physics.
Here is the goal: balanced cuts in the most visible areas. Sometimes that means centered. Sometimes it means shifting the grid a half tile so you do not end up with tiny slivers at a doorway.
Quick way to snap centerlines
- Measure the length of the room and mark the midpoint on both opposite walls.
- Snap a chalk line between those midpoint marks.
- Repeat for the other direction.
Where those lines cross is the room center. If you already created a squared baseline and perpendicular (Line A and Line B), you can measure off those to place your centerlines square to your chosen reference.
Step 4: Dry-fit your layout
Dry-fitting is the cheapest way to avoid the most expensive-looking mistakes.
You have two good options:
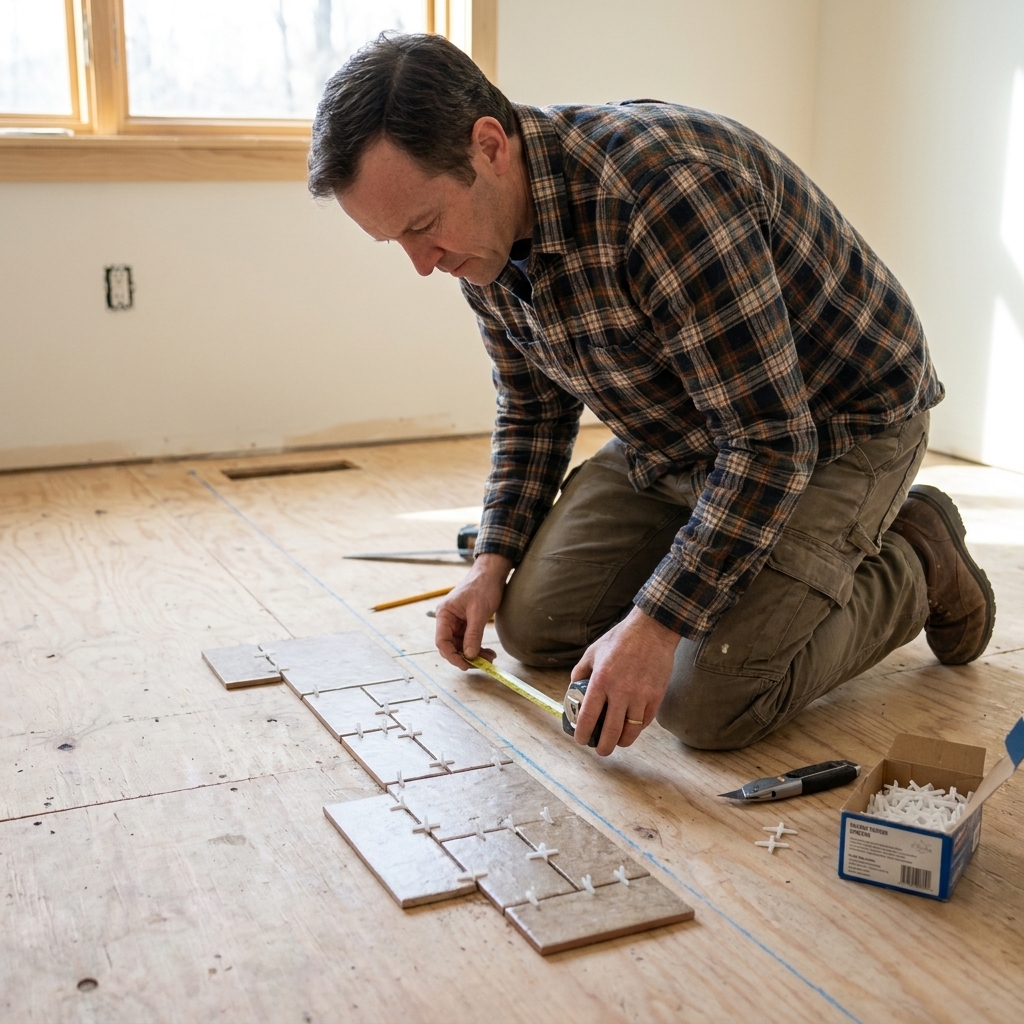
- Dry-lay a row: physically place tiles along your lines with spacers.
- Story pole method: use a straight board, mark tile plus grout joint increments on it, and “walk” it across the room.
What you are looking for
- No sliver cuts along the most visible walls, tub skirts, or doorways.
- Clean cuts at transitions (doorways, adjacent flooring, stair noses).
- Symmetry where it matters (fireplace hearths, centered entryways, long hall sightlines).
Rule of thumb: If your perimeter cuts will be less than about half a tile, shift your layout by half a tile and re-check. On many floors, that one change makes the entire job look “designed” instead of “accidental.”
Do your math like a pro: tile size is not always exact. Measure a handful of tiles and use the average size, then add your grout-joint width. Tile plus grout joint is your real module, and it is what your layout should be based on.
Step 5: Snap your control lines
Once you like the dry layout, turn those decisions into lines you can trust.
Keep it simple
Most floors go smoothly with:
- One main control line (your baseline, Line A)
- One square line (your perpendicular, Line B)
Everything else is measured off those. If you keep returning to your control lines, tiny errors do not compound into big headaches.
How to snap a chalk line that stays crisp
- Vacuum first. Dust kills lines.
- Load chalk lightly. Overfilled chalk boxes dump clouds and leave fuzzy lines.
- Hook and tension. Pull the string tight enough to “sing” when plucked.
- Lift at the midpoint and snap. One clean snap beats five weak ones.
- Lock it in only if you must. Some installers mist hairspray to reduce smearing. If you do, keep it minimal and only on surfaces you will cover with thinset anyway. Avoid spraying over uncoupling membranes, waterproofing, or any surface where the manufacturer warns against contaminants. When in doubt, skip it and re-snap as needed.
Chalk color note: Blue is easier to clean. Red is more permanent and can stain porous materials or cause headaches with light stone and light grout if it gets dragged around. For most DIY floors, I stick with blue.
Use a laser as backup
A laser does not replace layout lines. It backs them up.
Here is how I like to use a cross-line laser:
- Set the laser on a stable surface or tripod where it can “see” most of the room.
- Align the laser to your baseline chalk line. Adjust until the beam sits directly over the chalk.
- Use the perpendicular beam to verify your 90 degree line. If it drifts off your snapped line, re-check your 3-4-5 setup.
- During setting, reference the laser every couple rows to catch drift early, especially with long plank tiles.
Important: Check your laser’s stated accuracy, often around ±1/8 inch at 30 feet (but it varies by model). The farther you project, the more you must trust your original squared lines and verify with actual measurements.
Work with crooked walls
If you are in a 1970s house like mine, there is a good chance your walls are doing their own thing. Here is how to tile so it still looks intentional.
Do not chase the wall
If you run tile perfectly parallel to a crooked wall, the opposite side of the room may end up with wild cuts. Instead, square your grid to your best visual reference (often a doorway or long run), then let the perimeter cuts absorb the wall weirdness.
Hide the ugly
- Shift the layout so slightly uneven cuts land under baseboards, toe-kicks, or behind toilets.
- If you have a focal feature (fireplace, vanity, island), favor symmetry there.
- At doorways, aim for cuts that look balanced from the hall side, since that is where your eye usually comes from.
Layout tips by pattern
Straight lay
Snap perpendicular lines, start at the intersection, and check for square every few rows. This is the most forgiving pattern, but it will still highlight crooked starts.
Running bond
Keep your first row straight and your offsets consistent. Use your chalk line as a rail. For planks and many large-format tiles, follow the tile maker’s guidance (and common industry recommendations) and avoid a 50 percent offset if the tile has any bowing. A 33 percent offset often looks flatter and helps reduce lippage.
Herringbone
Herringbone is where layout mistakes go to get very visible. You want a centered spine (or a clearly intentional starting point) and very tight control lines.
- Snap a centerline and a perpendicular line through your focal area.
- Dry-fit a few “V” shapes to confirm how the pattern lands at walls.
- Consider snapping additional parallel guide lines to keep the pattern from slowly walking.

Common layout mistakes
- Starting from a wall you assume is straight: Verify with measurements, or create your own square grid with 3-4-5.
- Skipping dry layout: You end up with slivers at the edges or awkward cuts at doorways.
- Not accounting for grout joints: Tile plus grout joint is your real module. Include spacers when dry-fitting.
- Snapping lines on dust: The line smears, disappears, or shifts when you kneel on it.
- Letting small errors compound: Re-check against control lines as you go, especially in big rooms.
Before you mix thinset
- Room vacuumed and clean
- Baseline and perpendicular control lines snapped
- Layout adjusted to avoid tiny cuts in visible areas
- Doorway and transition cuts look intentional
- Laser confirms your main lines are straight
- You have an exit plan so you do not tile yourself into a corner
- Subfloor flatness checked, especially for large-format tile (layout cannot fix a wavy floor)
- You can explain your starting point in one sentence (if you cannot, you are not done yet)
If you can check every box, you are ready for the fun part. Or the messy part. Usually both.
FAQ
Should I start in the center of the room?
Start where it gives you the best-looking cuts in the most visible areas. That is often the center, but not always. Dry-fit both ways before you commit, and make sure you leave yourself a way out of the room.
How do I know if my room is square?
For a simple rectangular room, measure diagonally from corner to corner at floor level across the area you are actually tiling. If both diagonals match, the corners are square. Real rooms can have alcoves, bowed walls, and other surprises, so use diagonal checks as a clue, then rely on your squared control lines rather than trusting the walls.
What is the best 3-4-5 size to use?
Bigger is better. If you can manage 6-8-10 or 9-12-15, you will get a more accurate 90 degree than a tiny 3-4-5 in a tight space.
What chalk color should I use?
Blue is safest for most DIY work because it cleans up more easily. Red tends to be more permanent and can stain porous surfaces, especially light stone. If you are unsure, stick with blue and keep your lines crisp by vacuuming and re-snapping when needed.