A tile setter’s short list of must-have DIY tile tools, with practical tips on when and how to use each one for straighter lines, flatter surfaces, and few...
The Grout Nest
Updated October 17, 2026
Traditional Spacers vs. Tile Leveling Systems
Cross spacers set your grout joints. Leveling clips and wedges fight lippage. Here’s when the upgrade is worth it, what it costs, and how to avoid the most common DIY mistakes.

Ben Mitchell
Ben Mitchell is a former professional tile setter and passionate home renovator with over 12 years of experience in the flooring industry. After stepping away from commercial contracting, he founded Grout Nest to empower everyday homeowners to tackle their own flooring, tile, and backsplash projects with confidence. He believes that with the right tools, proper prep work, and a little patience, anyone can achieve a professional-grade finish.
If you have ever run your bare foot across a “finished” tile floor and felt a sharp edge catch your skin, you have met lippage. Lippage is the height difference between neighboring tiles, and it is one of the fastest ways to make a DIY install feel not quite pro.
Here is the part that trips up a lot of beginners: traditional cross spacers are fantastic at keeping your grout joints consistent, but they do almost nothing to keep two tiles in the same plane. That is where tile leveling systems (the clip-and-wedge or cap-and-strap kits) earn their keep.
Let’s break down what each tool actually does, where each one shines, and how to decide if leveling clips are a smart upgrade for your specific tile and substrate.
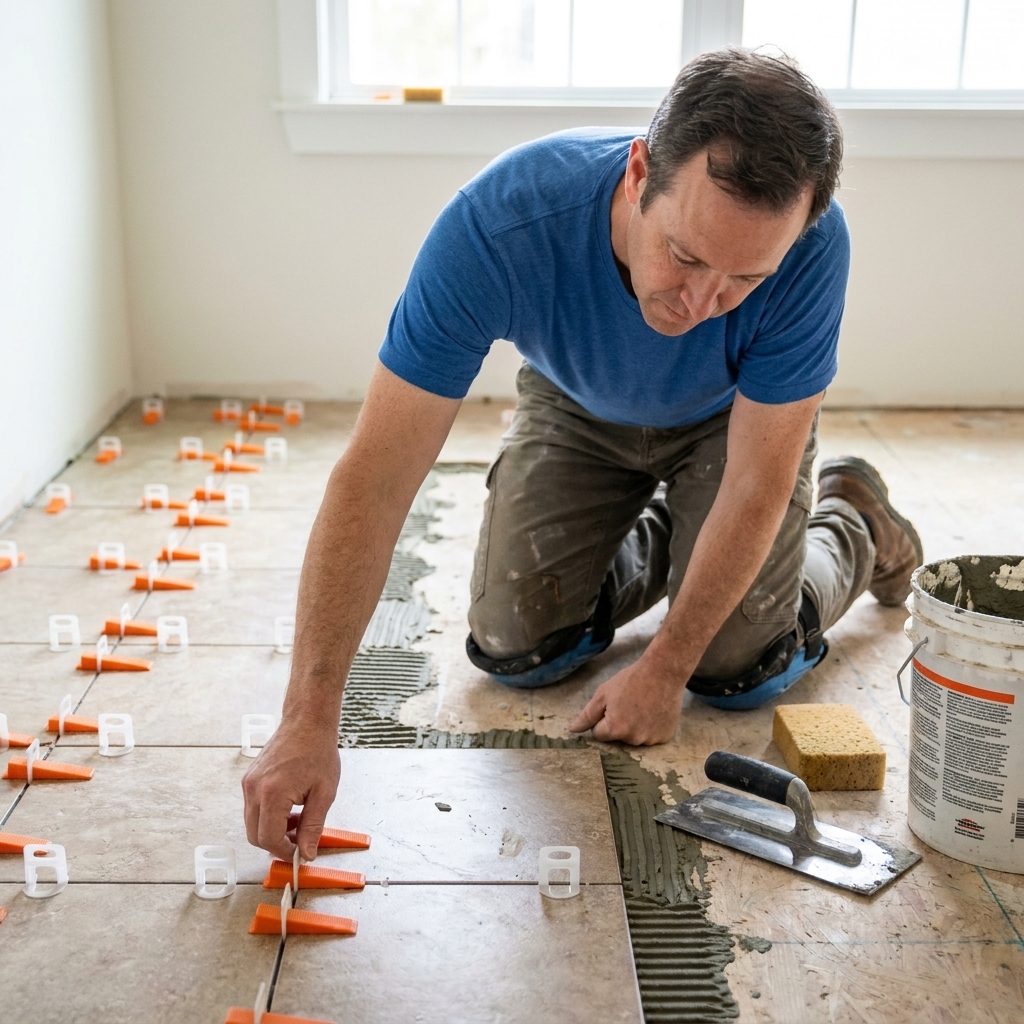
Spacers vs. leveling systems
Traditional spacers (crosses, T-spacers, horseshoes)
Spacers are joint-control tools. They set the distance between tiles so your grout lines stay uniform.
- What they control well: grout joint width and alignment.
- What they do not control: tile-to-tile height differences (lippage).
Yes, careful thinset work can reduce lippage with spacers alone, but the spacer itself is not doing that job.
Tile leveling systems (clips + wedges or caps)
Leveling systems are plane-control tools. They apply pressure across the tile edges to help neighboring tiles sit in the same plane while the mortar cures.
- What they control well: edge-to-edge height, especially with larger tile.
- What they do not fix: a wavy floor, a bowed tile, or bad mortar coverage.
Despite the name, these systems do not “level” a floor. They help reduce lippage during installation. Your prep work still decides most of the outcome.
What lippage really means
Not all lippage is created equal, and not every tiny edge difference is a disaster. What looks and feels “acceptable” depends on a few things: your tile’s edge profile (rectified vs. cushioned), the size of your grout joint, and the lighting in the room. Raking light from a window can make minor lippage look dramatic.
If you want a standards-based anchor for prep, the big one is flatness. ANSI/TCNA guidance commonly referenced by installers calls for substrate flatness of:
- Up to 15 inches on any side: no more than 1/4 inch variation in 10 feet (and 1/16 inch in 1 foot).
- Large and heavy tile (often defined as 15 inches or longer on one side): no more than 1/8 inch variation in 10 feet (and 1/16 inch in 2 feet).
Manufacturers and project specs can be stricter, so treat those numbers as a practical baseline, not a universal promise.
Why lippage happens
In the real world, lippage comes from a few repeat offenders:
- Subfloor or wall is not flat (this is the big one). Tile likes flat, not necessarily level.
- Large tile bridges high and low spots, so edges end up proud.
- Tile warpage. Many rectangular tiles have a slight bow, especially 12x24s and wood-look planks.
- Inconsistent thinset thickness from trowel angle changes, rushed setting, or not keying in mortar.
- Too much movement while you work, such as sliding tiles around after they start to grab.
Spacers only address one part of the picture: keeping the joints consistent. Leveling systems address another: pulling neighboring edges into plane while the mortar cures.

Spacers: pros and cons
Pros
- Cheap and simple. A bag costs less than a fancy coffee.
- Fast to learn. Place, set, move on.
- Flexible for tight spaces (niches, borders, small cuts).
- Great for small tile (mosaic sheets, 4x4, subway tile) where lippage is easier to manage by hand.
Cons
- Does not prevent lippage. You can have beautiful 1/8-inch joints and still have toe-stubbers.
- Can “float” in wet mortar if you shove them down too early or the thinset is soupy.
- Encourages false confidence. New DIYers see perfect spacing and assume the surface is perfect too.
Leveling systems: pros and cons
Pros
- Better lippage control on large tile, plank tile, and any tile where edges tend to ride up.
- More consistent finish for beginners. You still need technique, but the system gives you guardrails.
- Helps with transitions when you are setting over minor substrate variations (within tolerance).
- Can speed up fussing time. Less tapping, lifting, re-buttering, re-setting.
Cons
- Added cost. Most clips or straps are single-use; wedges or caps are usually reusable.
- Not magic. If your floor is out of flat, you can still end up with hollow spots or poor coverage.
- Can cause tile lift if over-tightened or used with the wrong trowel size, especially on smaller tiles.
- More steps. Inserting clips, tightening wedges, and later breaking off clips is extra work.
- Not ideal for every tile. Very small tile, fragile stone, and some softer ceramic wall tile can be a bad match without care.

When the upgrade is worth it
Leveling systems are usually worth it for
- Large and heavy tile (15 inches or longer on one side is a common ANSI cutoff), and the consumer-favorite sizes that come with it, like 12x24 and bigger.
- Wood-look planks (8x48, 9x36, etc.), where warpage and long edges magnify lippage.
- Rectified tile with tight joints (1/16-inch to 1/8-inch). Small joints make lippage more noticeable.
- DIYers setting their first big floor who want the best shot at a barefoot-friendly finish.
- Show surfaces like a main bathroom wall, shower feature wall, or a kitchen floor that gets raking light from windows.
Spacers alone are often enough for
- Smaller tile (subway, 8x8, 6x6) on a flat substrate.
- Mosaic sheets where clips do not fit and your real battle is sheet alignment.
- Rustic or heavily textured tile where slight edge variation is visually lost.
- Very small areas like a short backsplash run, where careful hand-setting is manageable.
My rule of thumb: If the tile is longer than your forearm or the light in the room hits the surface at a low angle, I reach for a leveling system. If it is a classic subway backsplash on a properly prepped wall, spacers and patience usually win.
Prep work is everything
I will say it the same way my uncle said it while I was mixing thinset as a teenager: prep work is 90% of the job. Leveling clips cannot save you from a floor that looks like a gentle ocean swell.
Check flatness, not level
Most tile failures that look like “level issues” are really flatness issues. A floor can be out of level and still tile beautifully if it is flat. Use a long straightedge (6 to 10 feet is great) and find the highs and lows before you open a single box of tile.
Quick method: mark high spots, measure gaps under the straightedge, and compare what you find to the flatness tolerances listed above for your tile size. If you are setting large and heavy tile, be pickier than you think you need to be.
Fix problems before thinset
- High spots: grind them down if appropriate for your substrate.
- Low spots: fill with a patching compound or self-leveling underlayment where needed.
- Wood subfloors: confirm stiffness and deflection, then install the correct underlayment (cement board or an uncoupling membrane) per manufacturer instructions.
Mind warpage and offset patterns
Rectangular tiles often have a slight bow. If you lay them in a 50% brick pattern, the highest point of one tile can line up with the lowest point of the next, exaggerating lippage. A 33% offset is commonly recommended for plank and 12x24 layouts because it reduces that “high meets low” effect, but always check the tile manufacturer’s recommendations. Some tiles are flatter than others, and some products have specific limits.
How to use them well
Using spacers like a pro
- Use the right spacer type: crosses for field tile, T-spacers at edges, and horseshoes for micro-adjustments on walls.
- Keep them near the surface: do not bury spacers deep in mortar where they become a surprise during grouting.
- Check for drift: every few rows, step back and sight your lines. Spacers can keep joints even while the whole pattern slowly walks.
- Control mortar consistency: too loose and tiles sink, too stiff and you lose coverage.
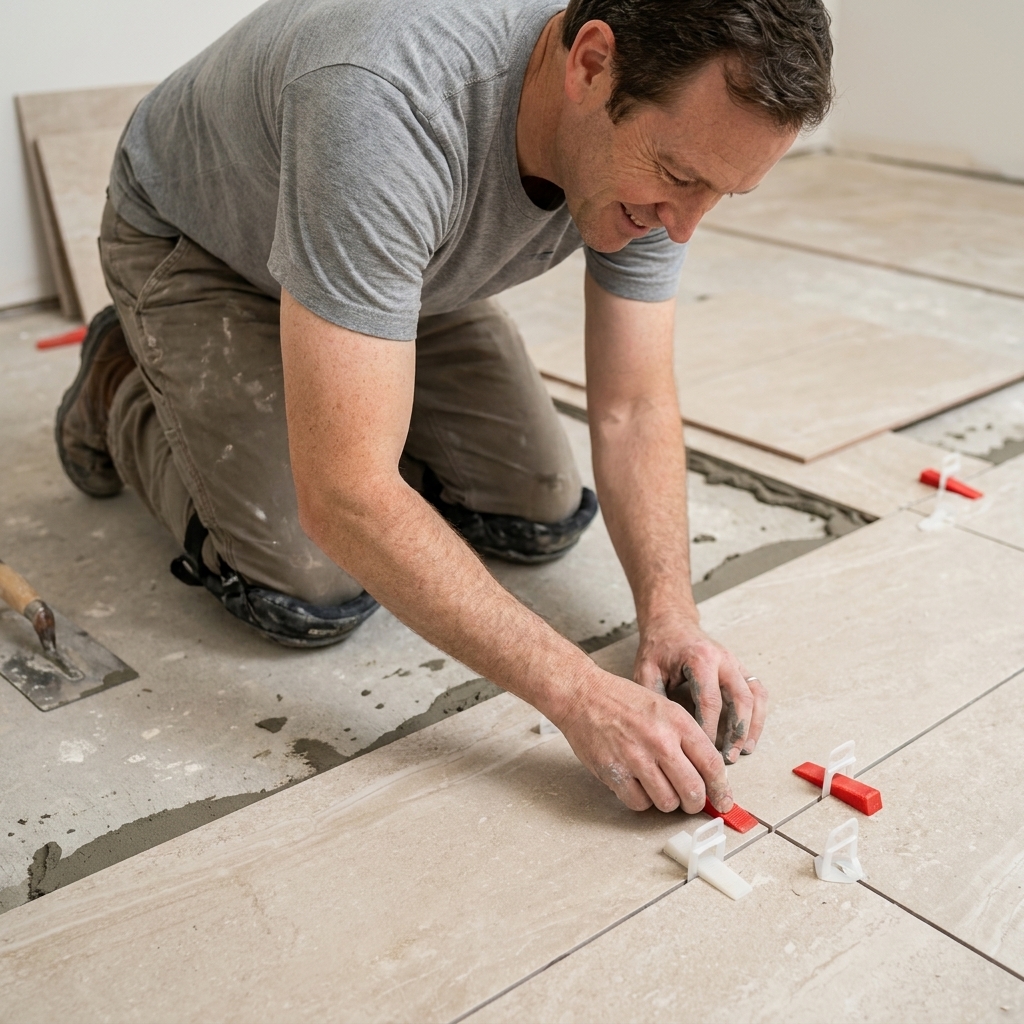
Using a leveling system correctly
- Pick a system sized for your grout joint. Clips come in different base thicknesses and joint sizes. Match it to your plan.
- Do not over-tighten. The goal is to bring edges flush, not squeeze all the mortar out from under the tile.
- Use enough thinset. Clips can tempt you to run a smaller trowel. Do not. Coverage matters more than convenience, especially in wet areas.
- Watch your coverage targets. A common benchmark is around 80% coverage in dry interior areas and 95% in wet areas (with good support at edges and corners). Pull a tile occasionally and confirm you are not guessing.
- Place clips strategically. More is not always better. Use additional clips near corners, along long edges, and where the floor dips.
- Break clips the right way. After cure, tap the stem in the direction of the grout line, not across it. Wear eye protection, and use a mallet and a small block if you want more control than a boot. Your toes will forgive you.
If you have ever gotten a wedge stuck because thinset oozed into the clip, welcome to the club. A quick wipe around the clip before tightening saves a lot of grumpy words later.
Cost and value
Traditional spacers are basically a rounding error in your budget. Leveling systems are not. But the value calculation is not just dollars, it is also risk reduction.
Traditional spacers
- Cost: low, usually just a few dollars per project.
- Best value when: tile is small to medium, substrate is flat, and you have time to check lippage as you go.
Leveling systems
- Cost: medium to high depending on brand and how many clips you need. Most straps or clips are one-time use; wedges or caps are usually reusable.
- Best value when: the tile is expensive, the tile is large, or the room is high-visibility. The system can help prevent the kind of “I guess we live with it now” lippage that stings every time the light hits it.
If you are installing bargain tile in a low-traffic laundry room, I would rather you spend money on subfloor flattening than on clips. If you are installing pricey 24x48 porcelain in your main bathroom, clips are cheap insurance.
Common myths
“Leveling clips make up for a bad subfloor.”
No. They can pull neighboring edges together, but they cannot flatten the whole plane without consequences. If you force tiles to follow a wavy floor, you risk poor coverage, hollow spots, and cracked grout later.
“If I use clips, I do not need to check with a straightedge.”
You still do. Check often. Clips reduce lippage, they do not guarantee flatness across multiple tiles.
“Tighter joints always look better.”
Tighter joints show more sins, not fewer. If you want 1/16-inch joints, your tile, substrate, and technique need to be ready for that commitment.
“More clips equals flatter tile.”
Too many clips can create its own problems, like squeezing mortar out and starving the bond. Use enough to control edges, then let your trowel and technique do the rest.
My pick for most DIY floors
On a typical DIY floor using 12x24 porcelain, I like a simple wedge-and-clip leveling system paired with hard spacers (or spacer shims) to keep the joint consistent. The clips help with lippage, the spacers help keep my layout honest.
For classic subway backsplashes, I usually skip clips and focus on:
- a flat wall surface
- the right trowel size
- clean, consistent joint spacing
- constant checking for “smiles” and “frowns” across rows
If you take nothing else from this article, take this: leveling systems are a lippage tool, not a substitute for prep. Spend your energy making the surface flat, then choose the tool that reduces your biggest risk.
Quick decision guide
- Using mosaic sheets? Spacers, a straightedge, and patience. Clips usually will not help.
- Using 12x24 or plank tile? Strongly consider leveling clips.
- Substrate questionable? Fix flatness first, then decide. No system fixes a roller-coaster floor.
- First time tiling a big room? Clips can be worth it just to lower the stress level.
- Tight joints and lots of sunlight? Clips often pay for themselves in the finished look.
FAQ
Do leveling systems replace spacers?
Not always. Many clips are designed to create a specific joint width, but you may still want traditional spacers in corners, along walls, around obstacles, or anywhere the clip base does not fit cleanly.
Can leveling clips be used on walls and showers?
Yes, and they can be very helpful on large wall tiles. Just remember that gravity is not your friend. Use the right thinset for the application, key it in, and make sure your ledger boards and layout lines are solid.
Will a leveling system prevent tile from sinking overnight?
It can help, but it depends on mortar consistency and coverage. If thinset is mixed too loose or you are setting into a very thick bed, tiles can still settle. Proper mix, proper trowel, and back-buttering when needed are the fixes.
What is the biggest beginner mistake with leveling systems?
Over-tightening wedges and starving the mortar bed. Tighten just enough to bring edges flush. Then stop.